Calibrator
Introduction to Instrument Calibration
A
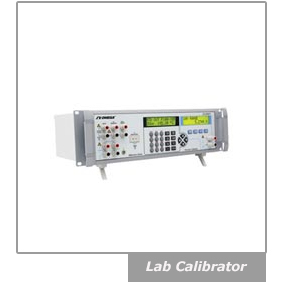
calibrator is an equipment used to adjust an instrument accuracy, often associated with a specific application. The most sophisticated
industrial equipment will not be very useful unless it is calibrated. Through calibration, adjustments made to a piece of equipment ensure that it performs as
expected—that it can be relied on to deliver predictable, accurate results that meet quality standards.
Simply defined, calibration is the process of adjusting a device to meet manufacturer’s specifications. Calibration is sometimes also defined as the
issuing of data, including a report or certificate of calibration, that assures an end user of a product’s conformance with specifications, and perhaps also
with external guidelines, such as those of the International Organization for Standardization, whose ISO 9001 standards, for example, set worldwide
specifications for business sectors. A company follows these standards to ensure that its products and/or services gain acceptance among suppliers and
customers. This second definition of calibration is more properly referred to as certification.
Most instruments and sensors are designed to meet certain accuracy specifications; the process of adjusting an instrument to meet those specifications
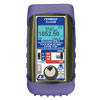
is referred to as calibration. The device used to calibrate other instruments is known as a calibrator. Calibrators vary in form and function depending
on the instruments with which they are designed to work.
OMEGA Engineering offers a wide range of
calibrators in Malaysia.
Learn more about calibrator
What Is NIST Traceability?
The National Institute of Standards and Technology (NIST), part of the U.S. Department of Commerce, oversees the development of measurement standards and
technology consistent with the International System of Units (SI). NIST is also charged with imparting these standards to the American system of
measurements through calibrations and other services. To help U.S. industry meet international standards, NIST provides, among other programs, laboratory
accreditation that enables a business to establish traceability of measurement results.
The Calibration Process
A company with equipment needing calibration may send it to a metrology/calibration laboratory, where a skilled technician will either bring it up to
specifications or confirm that it already meets them, using measurement/test instruments that must themselves meet strict calibration requirements. All or part
of the components used in an industrial process can be calibrated. A temperature calibration, for example, could involve a probe alone, an instrument alone,
or a probe connected to an instrument (a system calibration). Adjustments made during calibration must fall within certain tolerances. Such tolerances
represent very small, acceptable deviations from the equipment’s specified accuracy.
How often should an instrument be calibrated?
The manufacturer usually does the initial calibration on its equipment. Subsequent calibrations may be done in-house, by a third-party lab, or by the
manufacturer. The frequency of recalibration will vary with the type of equipment. Deciding when to recalibrate a flowmeter, for example, depends mainly on how
well the meter performs in the application. If liquids passing through the flowmeter are abrasive or corrosive, parts of the meter may deteriorate in a very
short time. Under favorable conditions, the same flowmeter might last for years without requiring recalibration. As a rule, however, recalibration should be
performed at least once a year. Of course, in critical applications frequency will be much greater.
What Is Involved in a Typical Calibration?
A weighing system serves well in illustrating general principles of calibration. Archimedes and Leonardo Da Vinci used the positioning of calibrated
counterweights on a mechanical lever to balance and thereby determine unknown weights. A variation of this device uses multiple levers, each of a different
length and balanced with a single standard weight. Later, calibrated springs replaced standard weights.
The introduction of hydraulic and electronic (strain gage-based) load cells represented the first major design change in weighing technology. In today’s
processing plants, electronic load cells are preferred in most applications. To check if transducers and load cells are functioning properly, the user must
answer the following: Does the weight indication return to zero when the system is empty or unloaded? Does the indicated weight double when the weight doubles?
Does the indicated weight remain the same when the location of the load changes (uneven loading)? If the answers are yes, the cells and transducers are
probably in good condition.

Choose the right calibrator
 Black Body Calibrators
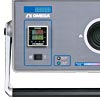
A black body is used for calibrating infrared pyrometers. They typically consist of a target plate that has a very high emisivity.
The temperature of the target plate can be controlled to very tight tolerances. To calibrate and infrared pyrometer, the pyrometer makes
a measurement of the the target plate. The controlled temperature of the plate is compared with the pyrometer reading. The pyrometer is
then adjusted until the the difference is minimal. The high emissivity of the target plate minimizes emissivity errors.
 Block Calibrators
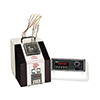
Block Calibrators are used for calibrating temperature probes. They contain a metal block that can be heated to a precise temperature.
Temperature probes can be inserted into the block and the measured temperature of the probes can be compared with the controlled temperature
of the blocks. Since temperature probes generally don't have any adjustments, this is really verification process rather than a true calibration.
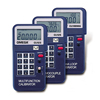 Simulators and Signal References
When calibrating an instrument, such as a panel meter or temperature controller, it is necessary to input a precise known electrical signal.
The instrument's display or output value can then be adjusted to match the input signal. a signal reference is used to generate the precision
signal. Signal references are available as voltage references, current references and frequency references. When working with an instrument
that reads a sensor, such as thermocouple, a special type of signal reference, called a simulator is used. The simulator can accurately
reproduce a sensor output. Many signal references and simulators can not only generate signals but read them as well.
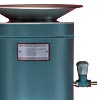 Fluidized Sand Bath Calibrators
Triaxial accelerometers measure the vibration in three axes X, Y and Z. They have three crystals positioned so that
each one reacts to vibration in a different axis. The output has three signals, each representing the vibration for
one of the three axes. The ACC301 has lightweight titanium construction and 10 mV/g output with a dynamic range
of +/-500 g's over a range of 3 to 10 kHz.
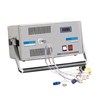 ice point™ Calibration Reference Chambers
ice point™ calibration reference chambers employ thermoelectric cooling elements to produce a very precise stable 0°C reference chamber.
The reference chamber can be used for calibrating temperature probes but they are also commonly used in simulating a thermocouple signal
for the calibration and verification of instruments that read thermocouples.
Frequently Asked Questions
Why Is Calibration Important?
On April 12, 1934, an anemometer on the summit of Mount Washington in New Hampshire measured the highest surface wind speed ever recorded: 231 miles per hour.
The Mount Washington anemometer, which had been calibrated in 1933, was recalibrated after the world record measurement, and it proved to be accurate. When a
typhoon hit Guam in December of 1997, the record seemed to be broken — an anemometer at an American air force base recorded a wind gust of 236 mph. That
reading, however, did not stand because the National Climate Extremes Committee judged the Guam anemometer unreliable. To metrology experts, the survival of
the old record was an object lesson in the importance of calibration. A footnote: wind speeds greater than 231 mph are believed to have occurred in tornadoes,
but no documentation device has yet withstood such extremes. Contrary to rumor, the Mount Washington anemometer did not blow away during the 1934 storm. Today, it resides in the mountain’s Observatory Summit Museum.
For a more down-to-earth example of what happens when calibration gets short shrift, one need look no further than the “oven temperatures may vary” statement
on the cooking instructions of frozen food. The reason for the caveat is that most household ovens are never recalibrated after they leave the factory.
Consumers apparently can live with this margin of error, but it is a different story for manufacturers. For a company to be ISO 9001-compliant, equipment
calibration is required. Rules alone, however, do not explain why the best companies recognize the importance of doing calibration correctly and frequently.
Considering the benefits in quality, productivity, and revenue that a well-designed calibration program can realize, costs are reasonable. Although small
calibration tasks can be adequately performed in-house using off-the-shelf calibrators, most medium-to-large companies that view calibration as a high priority
opt for the services of an independent metrology/calibration lab. A very large company might consider investing in automated equipment intended for conducting
many daily calibrations, but such equipment—the same kind used by independent labs—is expensive, and it requires skilled technicians. If gaining
certification from some outside calibration authority is also necessary, this adds to costs
Shop for Calibrators in Malaysia
The OMEGA Engineering Singapore office services all of Southeast Asia and Taiwan. We have Application Engineers and Sale Support Staff ready to assist
you with your technical questions, quotations and orders. A one-stop source for process measurement and control based in the heart of Singapore.
We provide support through web chat, e-mail and telephone. Come visit our office; view our
contact page for location details.
Calibrator | Related Products
↓ View this page in another language or region ↓



 Calibradores
 Calibradores
 Calibradores
 Calibrators
 Kalibratorer
 Calibrateur
 Kalibratoren
 Calibratori
 Calibrators
 Calibrador
 Calibrators
 Calibrators
 校准器
校准器 Calibrators
 校正装置
校正装置 캘리브레이터
 Calibrators
 Calibrators
 Calibrators
 Calibrators
 Calibrators